
Managing Your Projects
Click My projects in the left sidebar to open the Projects page. From here, you can update project details, change the responsible person, manage preview images, or delete a project.
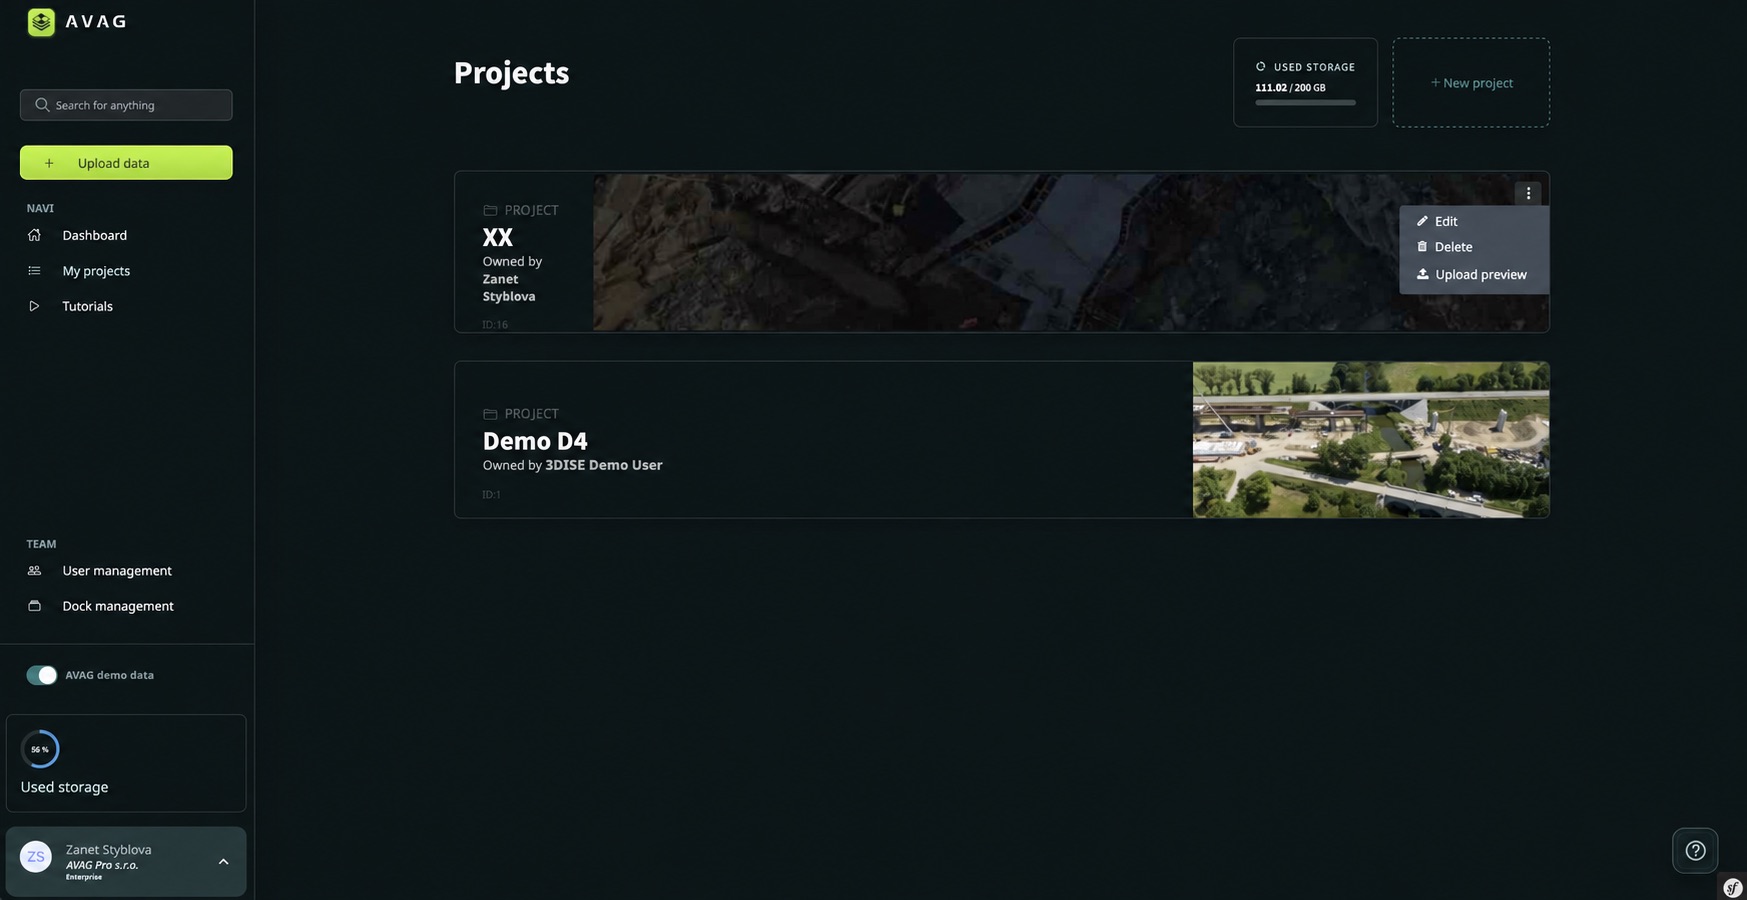
Open the project menu
Section titled “Open the project menu”Hover over a project card and click the ⋮ (three-dot) icon in its top-right corner. The menu contains four options:
- Edit
- Delete
- Upload preview
- Delete preview
Tip: The DEMO DATA project is a read-only sample project. It cannot be edited or deleted.
Edit a project
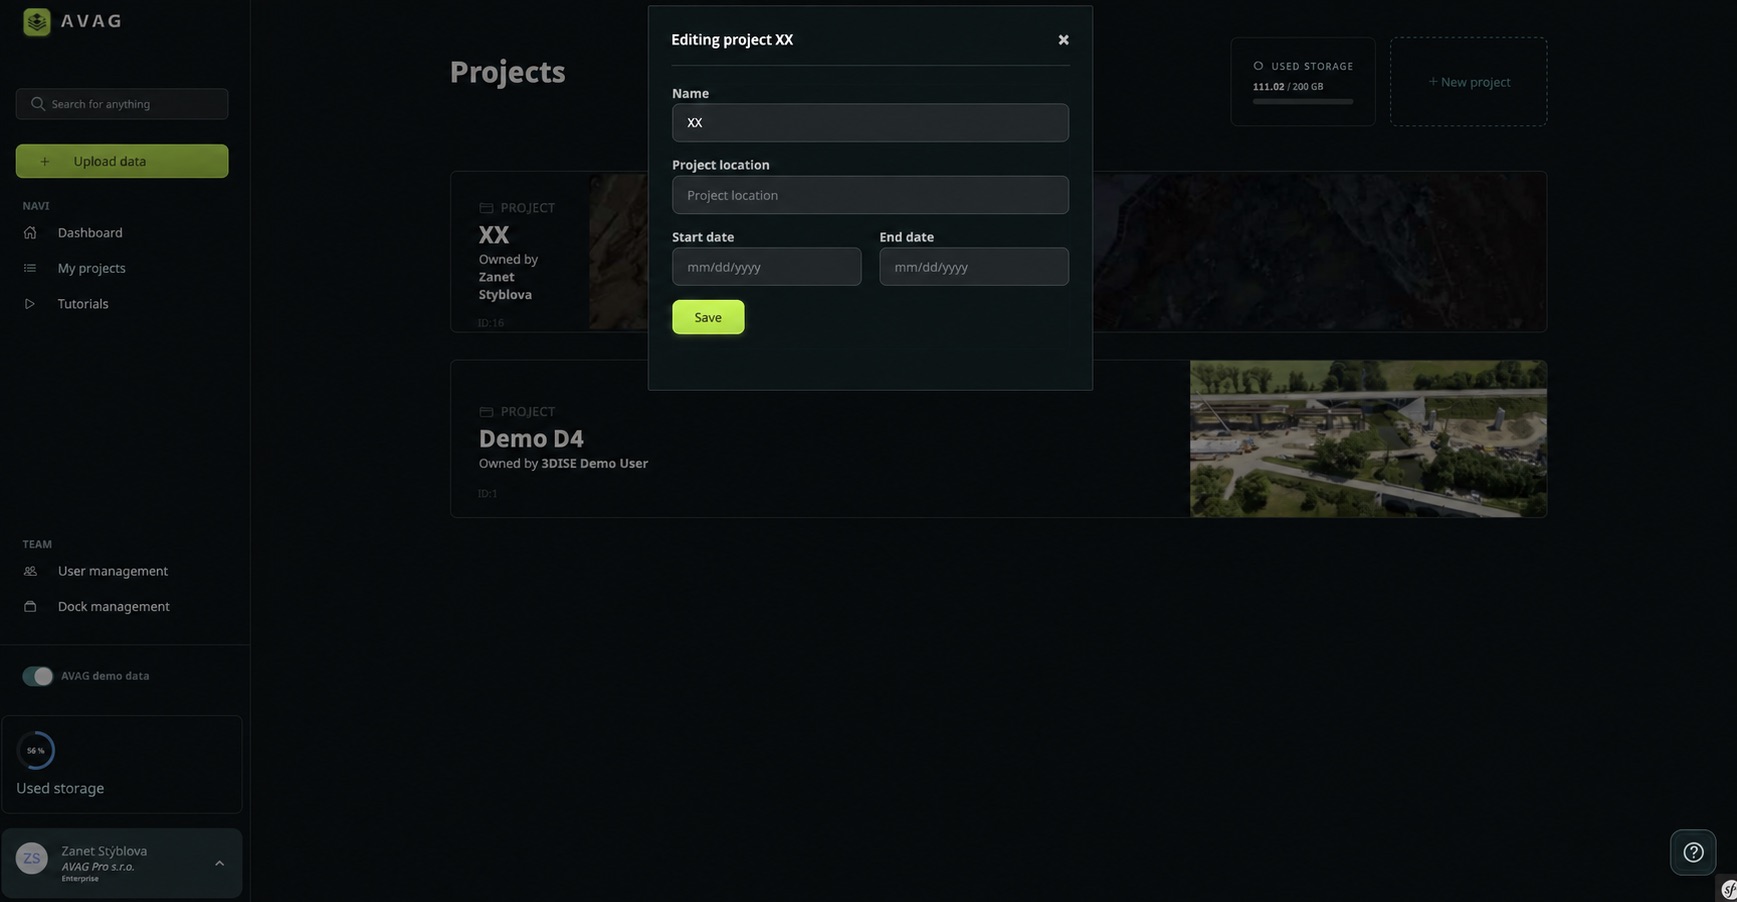
Section titled “Edit a project”Click Edit to open the Editing project window. You can update:
- Name – The project’s display name.
- Project location – A free-text description of the location.
- Start date and End date – The project’s timeline.
- Person responsible – The team member responsible for the project.
To reassign the project, select a different team member from the Person responsible dropdown.
Click Save to apply your changes. The responsible person appears on the project card as Owned by [Name].
Manage the project preview
Section titled “Manage the project preview”Use Upload preview to add or replace the image displayed on a project card.
Use Delete preview to remove the preview image without deleting the project.
Delete a project
Section titled “Delete a project”Select Delete from the project menu. A confirmation window asks whether you want to delete the project.
Click OK to permanently delete it, or Cancel to keep it.
Warning: Deleting a project is permanent and cannot be undone. All datasets, files, and data associated with the project will be removed. The freed-up space will be reflected in your Used storage total.